I’ve always had a big interest in robotics and electronics in general, so when I heard about the Raspberry Pi, I knew I had to build a robot around it. This is what I came up with:
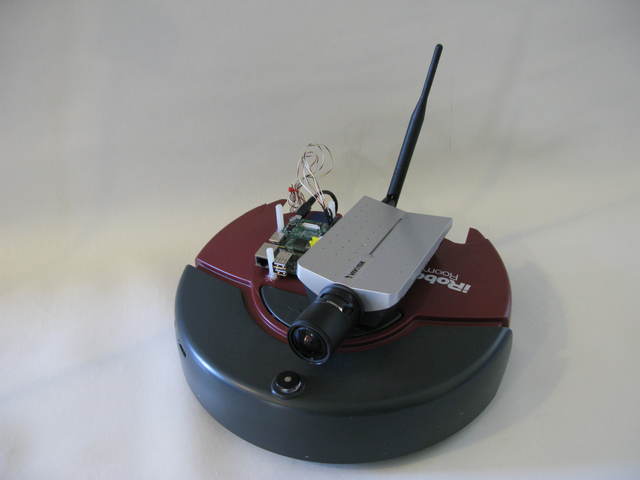
The robot, ready to do your bidding. Necessary wifi dongle not shown.
The model of roomba that I used has two drive wheels and a coaster wheel in front, and the drive wheels draw almost 300mA of current, so powering them directly off of the Raspberry Pi’s GPIO obviously wouldn’t work. So, I considered using a relay board to control the two drive motors from the GPIO. However, it turns that all the good boards were a little too expensive for a hobby project, so I decided to open the roomba up and see if I could somehow control the motors from the existing circuitry. Guess what? It turns out that there are four small transistors on the main board that power four larger transistors that deliver power to the motors. This means that there are two transistors per motor: one for forwards and one for backwards.

The four small transistors I mentioned are circled in red. Behold my soldering!
I had a little help in discovering this from a video that a man named Dean Segovis had posted on YouTube, but I ended up taking a multimeter to the board; just to make sure that I wasn’t hooking my precious pi up to anything dangerous. You can watch Dean’s video here: https://www.youtube.com/watch?v=TVp6QWcoilk.
Once I had confirmed the location of the transistors I needed on the board, I connected their bases to GPIO pins 4, 17, 18 and 21 on the Raspberry pi with with a 16 pin socket that I had lying around.
To power the Raspberry Pi, I soldered together a power supply circuit around a 1 amp 5 volt regulator (basically the regulator and two capacitors) on a piece of perf board and had the 5v output from the regulator run to a micro USB connector. I also added some miscellaneous components to the circuit, like a power switch, a 2.5 Amp fuse, a 12 volt in socket and some 12 volt out sockets; one of which the camera is plugged into. The roomba’s main board is also plugged into a 12 volt out socket.
For the camera, I just used an ip network camera from the company Vivotek.
I had tried to use a USB webcam that you might use for skype calls, but streaming video from the pi slowed it way down and the picture quality wasn’t as good as I had wanted. I wasn’t using the best webcam in the world, though.
To hold the Pi in place on the robot, I just glued some plastic pegs where I wanted it to go:
One in between the USB and Ethernet ports, one in between the audio jack and the component video port, one near the HDMI port
and one near the SD card slot. This makes it easy to remove the Pi from the robot when It isn’t in use, yet it holds it in place very well.

The ‘holder’, with Rpi inserted.
Lastly, I wrote some software in python to take input from a Nintendo wii remote and transmit the input it got to the Pi over wifi, where it’s decoded by another piece of python software and the wheels are moved according to the position of the joysticks on the wii remote. You can get my code at the links below:
Server.py – This one runs on the Raspberry Pi:
Server.py
Client.py – This one runs on your “base station” computer, a laptop for example:
Client.py
You can watch a short video of me driving the robot around on my YouTube channel:
https://www.youtube.com/user/doitnowlabs
And I think that’s about it. If I was unclear about anything or if you want a more detailed description of my project, please email me at benhjake (at) gmail.com , or leave a comment below. Also, if you replicate my project, I’d love to see a picture or two. You could email those to the same address. Thanks, and Happy Hacking!